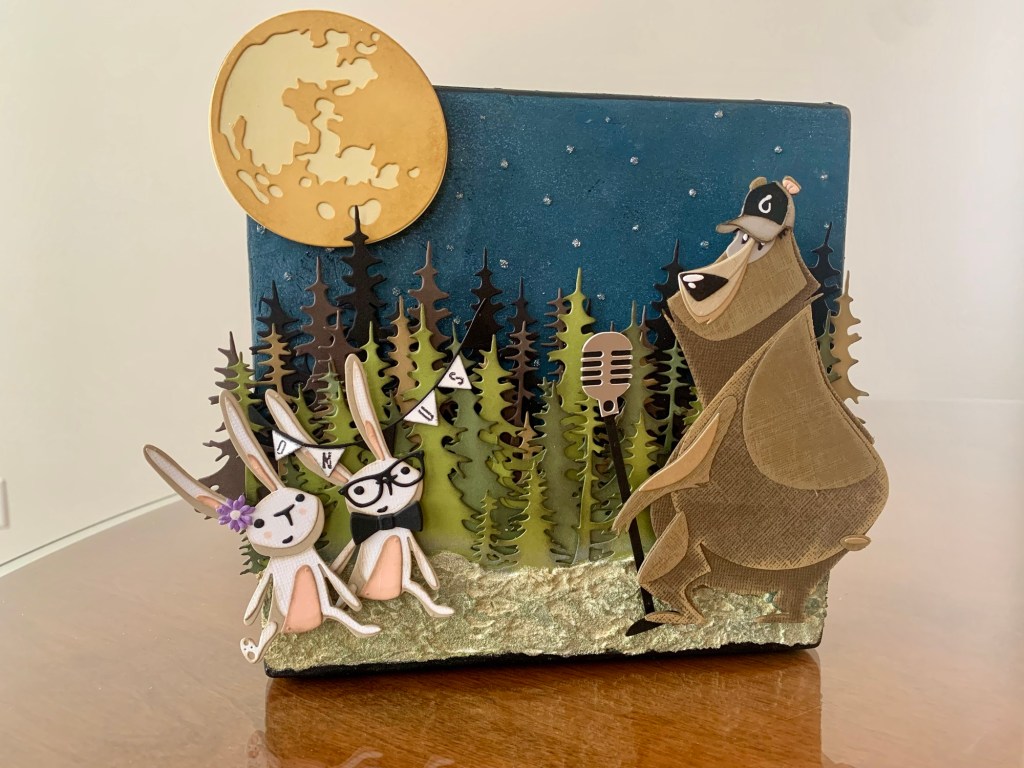
This is a make that started with my little brother wanting my very first make under Craftissions. I’ve created lots over the years for people but when I mentioned my new journey that I was going on, he insisted to be the first to get a creation! I had all the creative freedom as he said, “It can be a card, a scrapbook page, whatever you want to make, I want it!” Well from there my ideas went crazy with the possibilities but I quickly narrowed it down to complimenting his artistic side in his music.
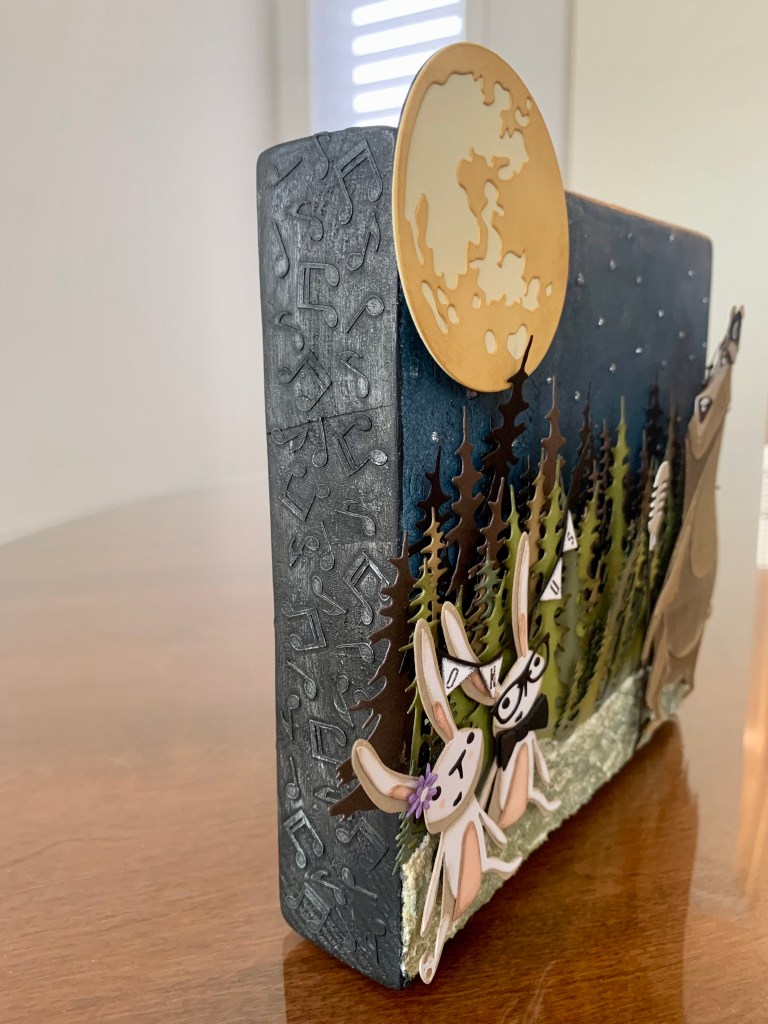
Once I had a solid grasp on a theme, then came out my love of all things Tim Holtz! The vision of a concert in a forest with some of Tim’s amazing animals was the perfect setting, now to only just pick a few animals was the next challenge haha!
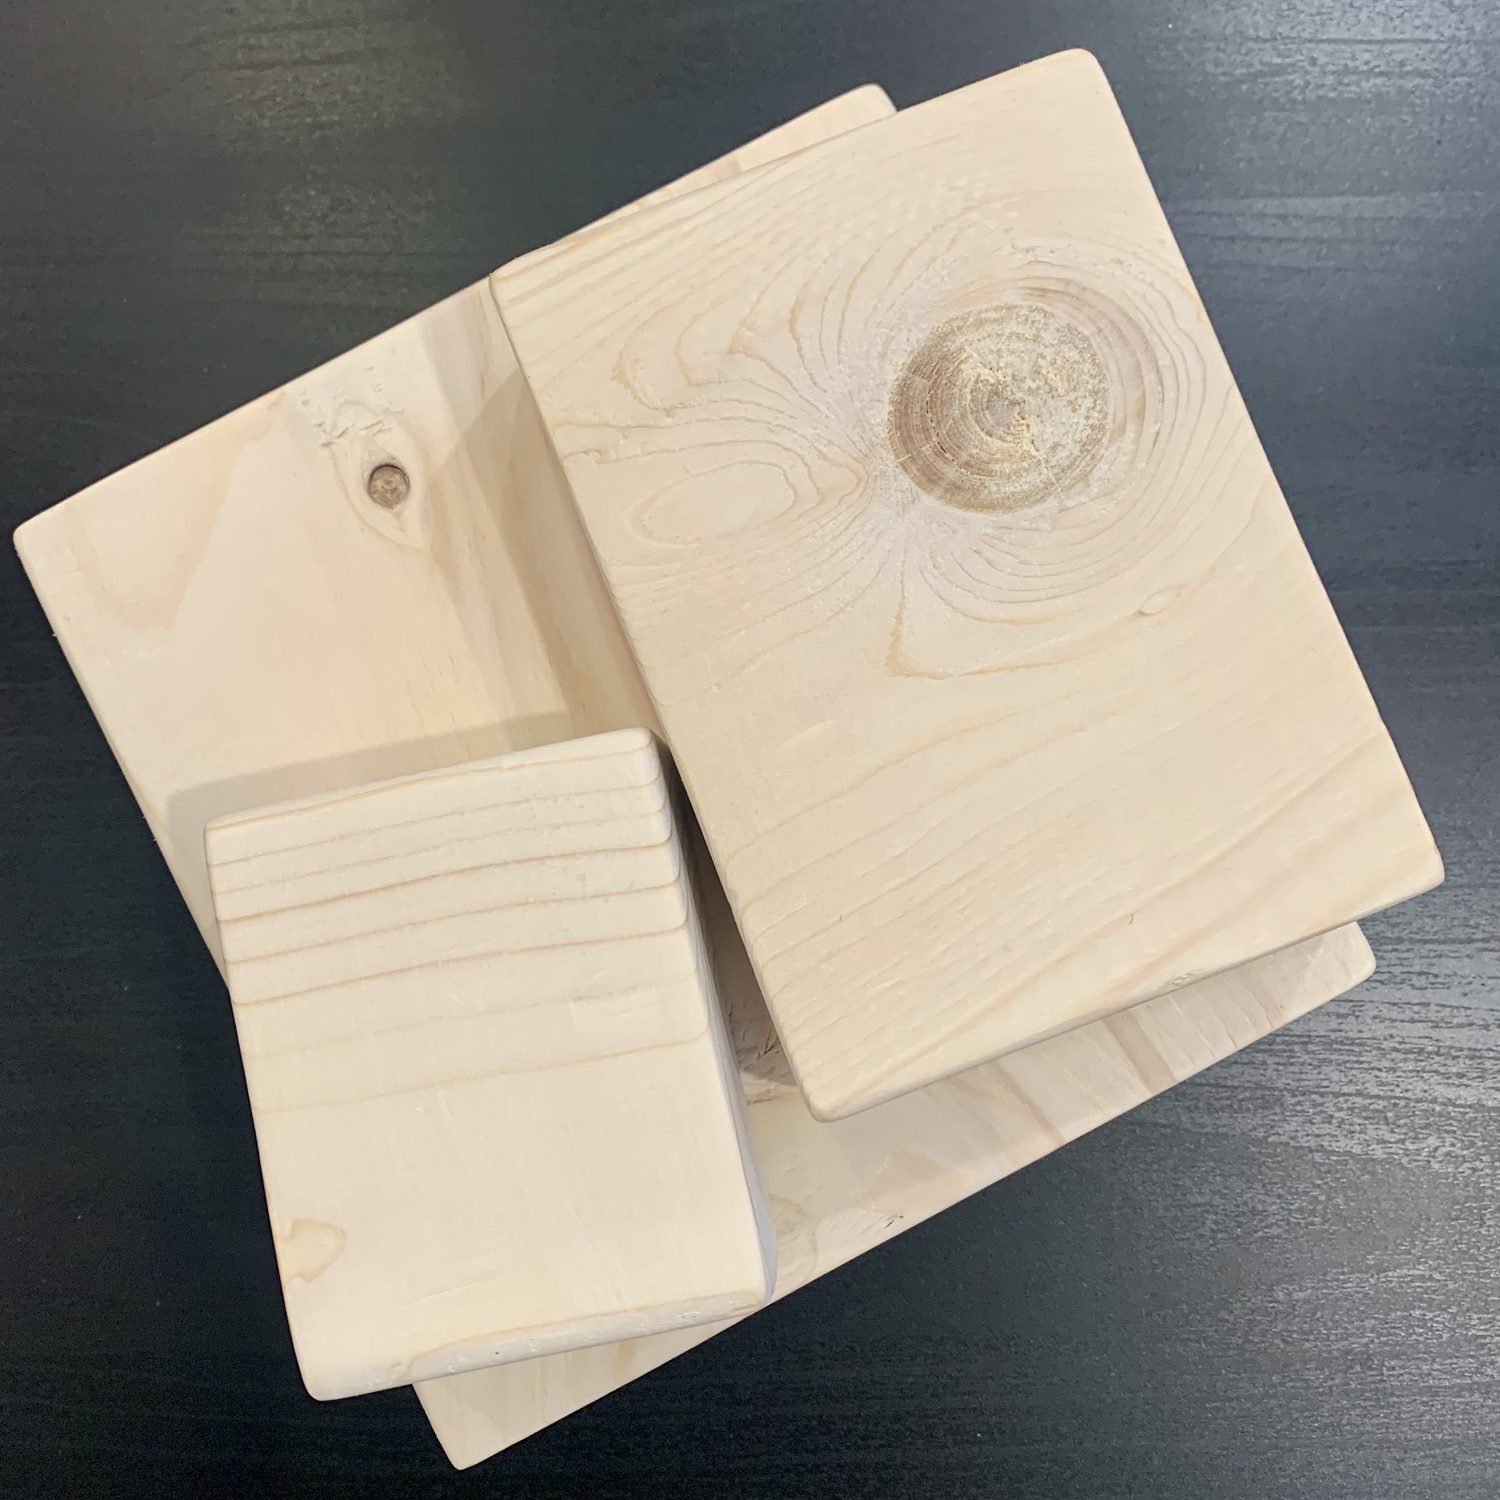
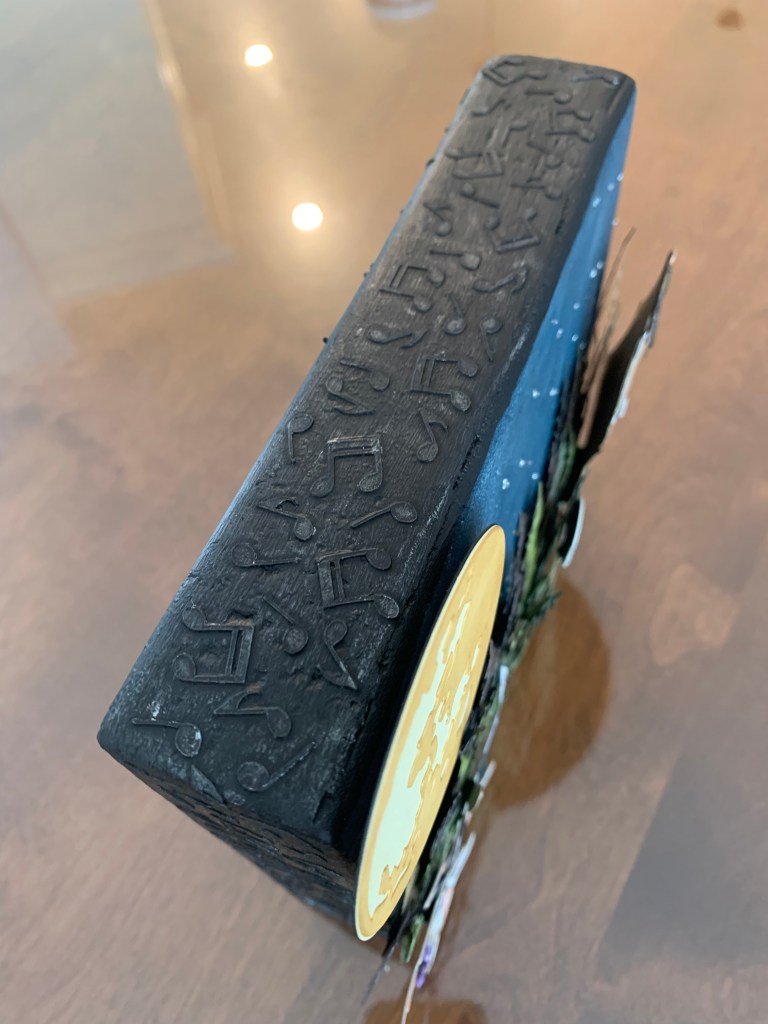
I knew I wanted this creation to be a piece of decor for his space, so then I had to get to work with the wood that was just purchased. The right piece ended up being the bottom piece seen in the picture below which was cut from a 2×8. My thoughts were that it needed to be a fair size but still have some of the pieces to go over the edges when done to create some dimension. Dimension is something that I LOVE and feel that adds to a finished piece!
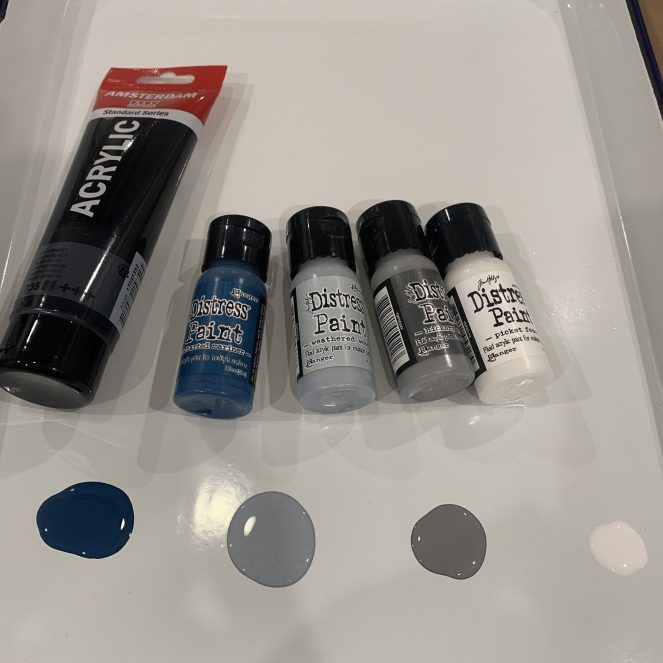
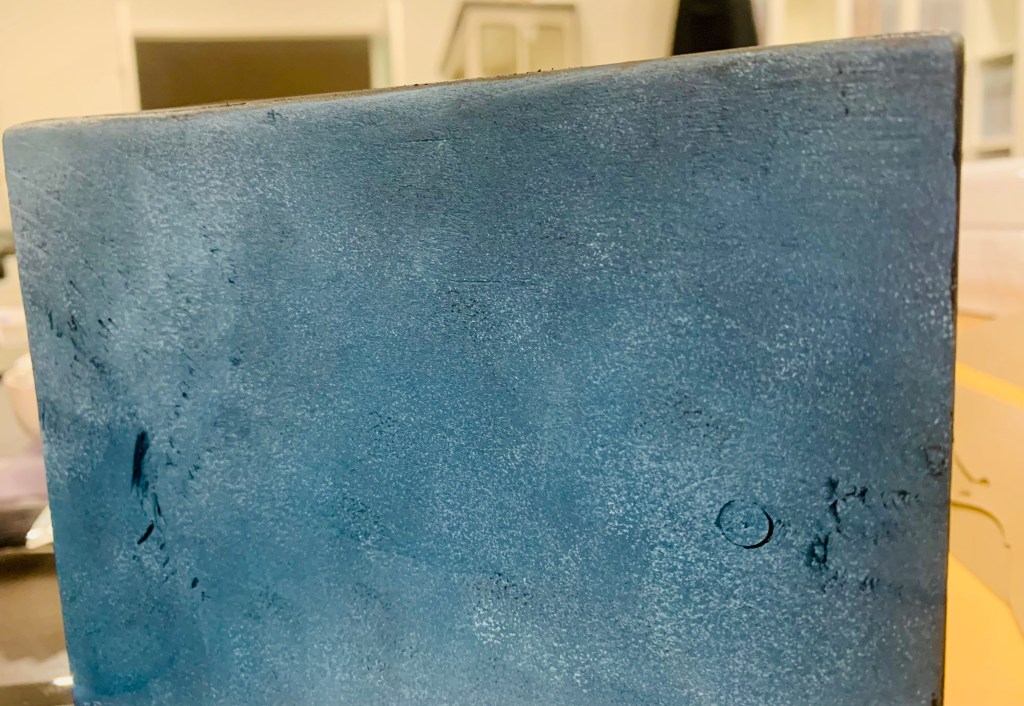
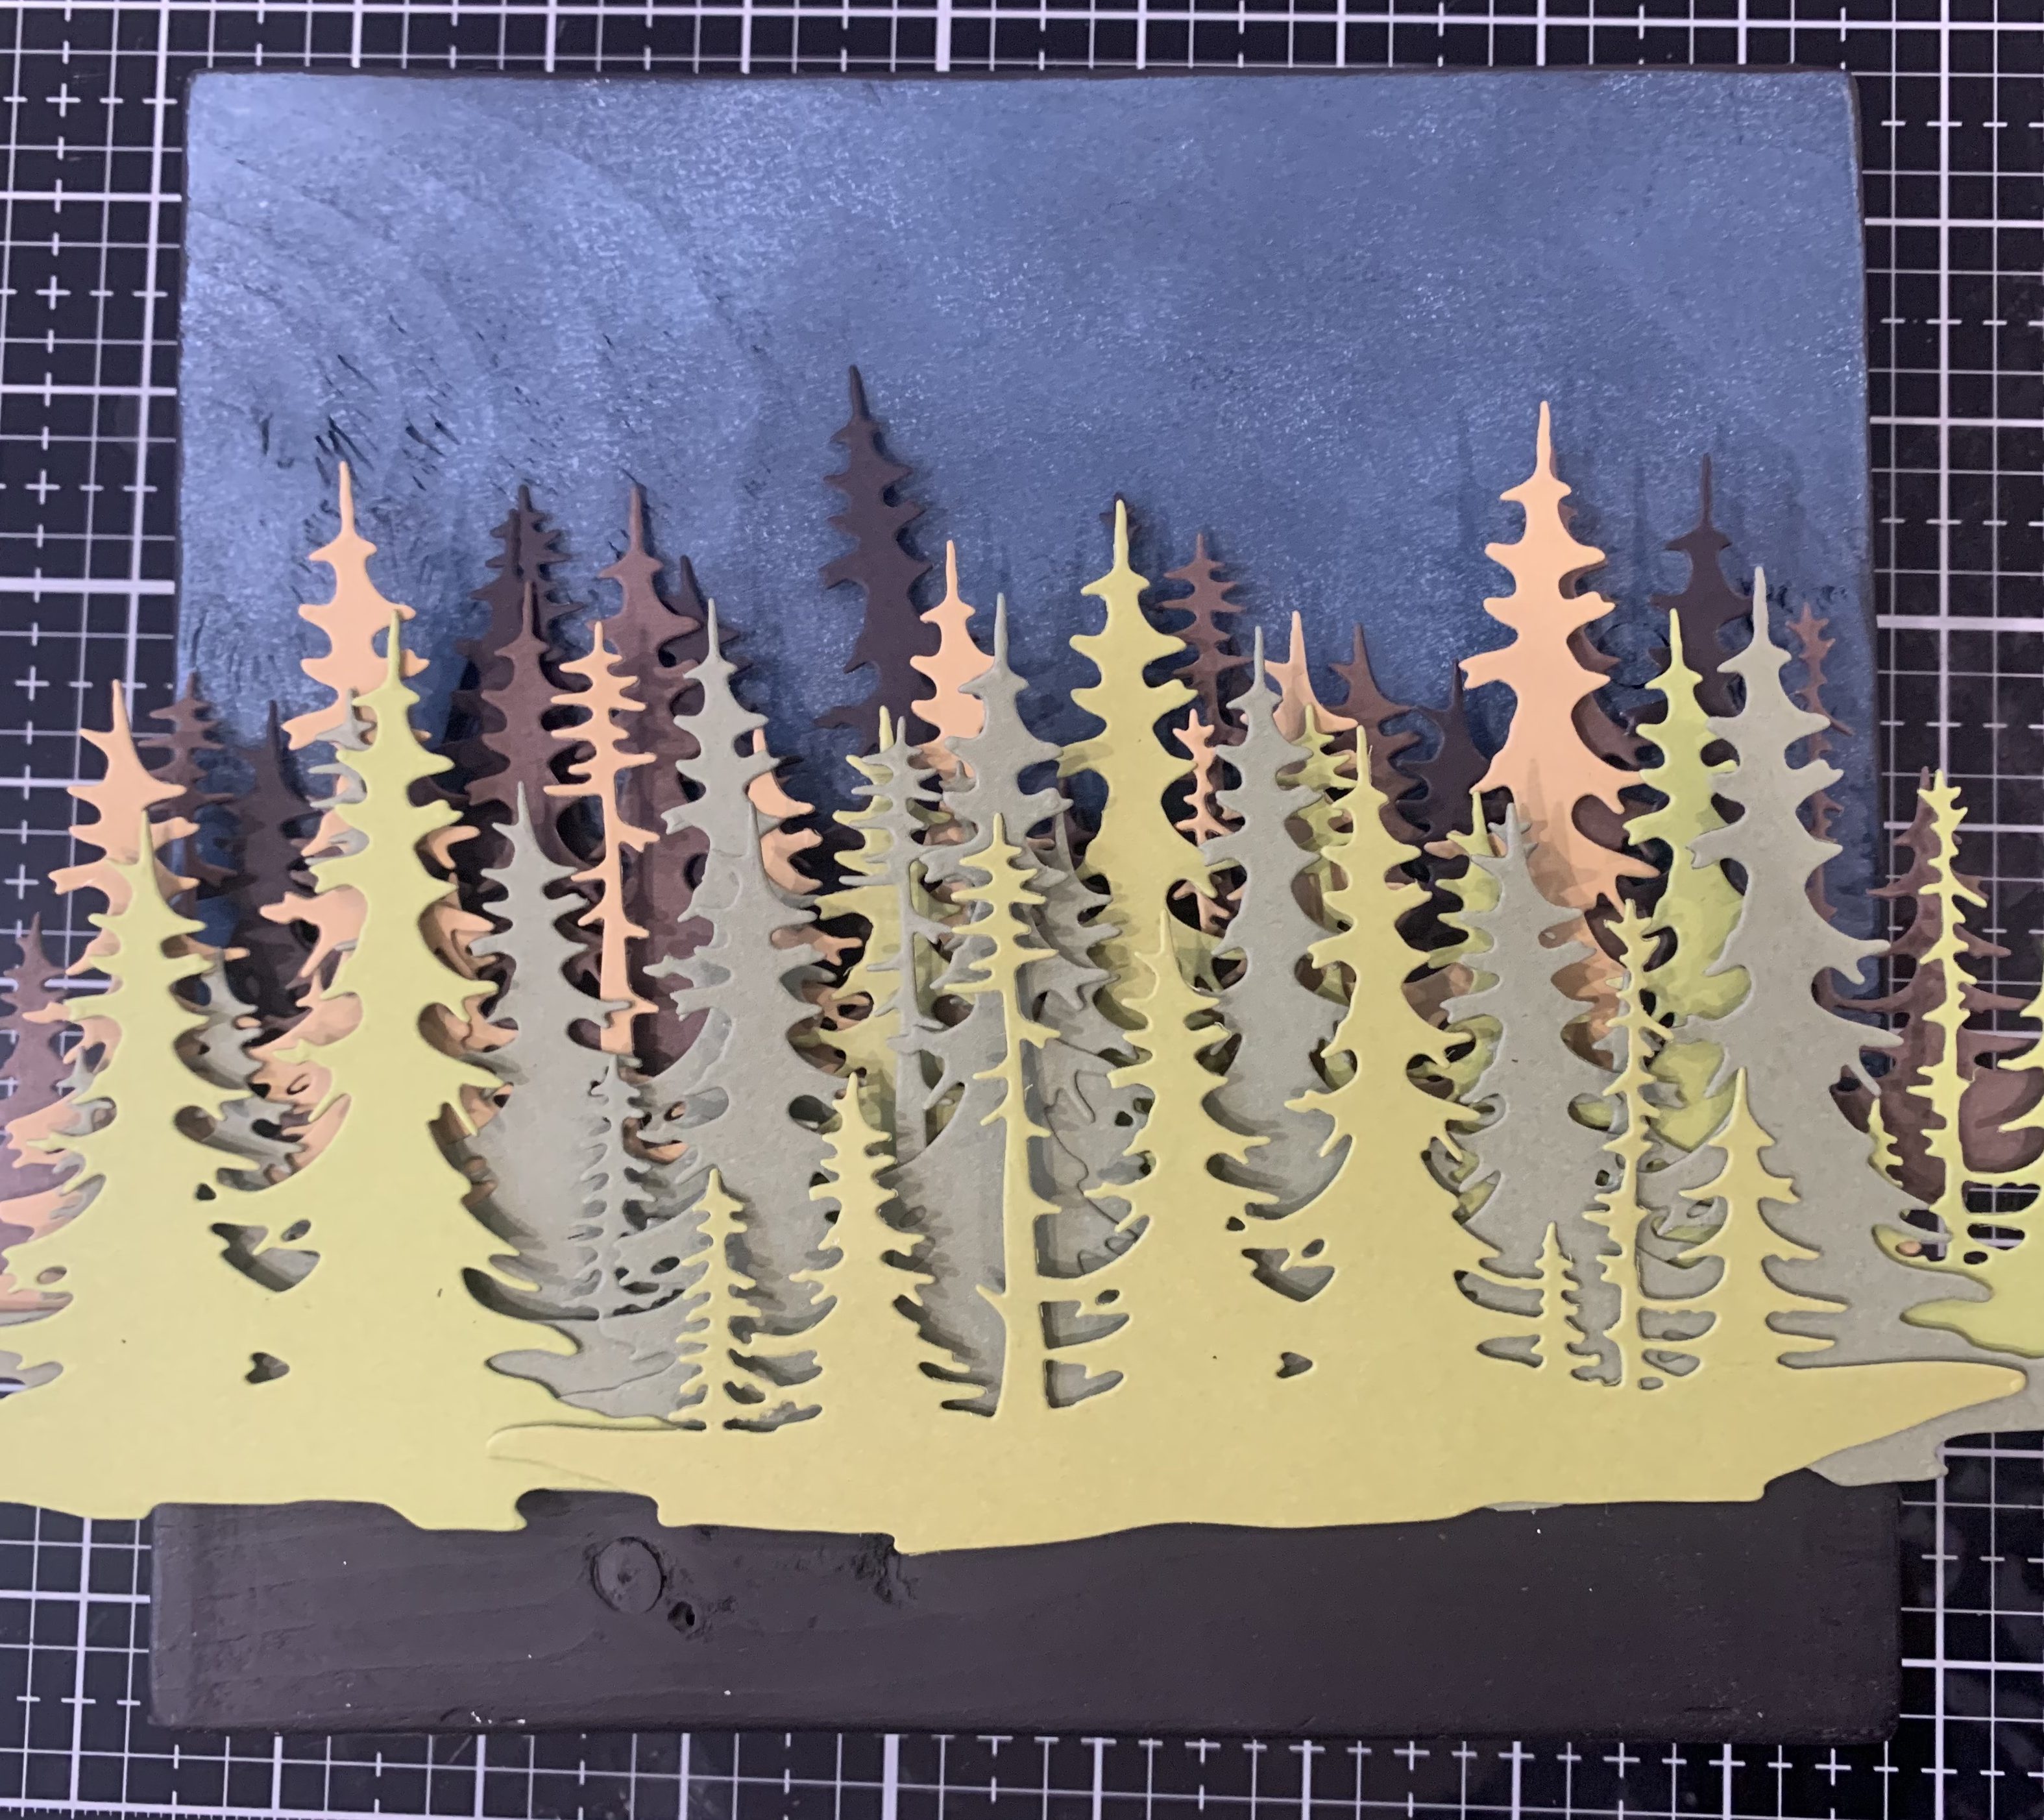
A night sky was ideal for this one as a star lit concert was the perfect setting for this bears concert to be held! Above you can see the Distress and Amsterdam paints that were used to create the sky. Distress Uncharted Mariner, Weathered Wood, Hickory Smoke and Picket Fence and Amsterdam Black Oxide were the colours to give the sky the look that was created. Charted mariner was used for the base and then the remaining colours were sponged on until I was happy with how it looked. I like this process as it can be very forgiving and fun!
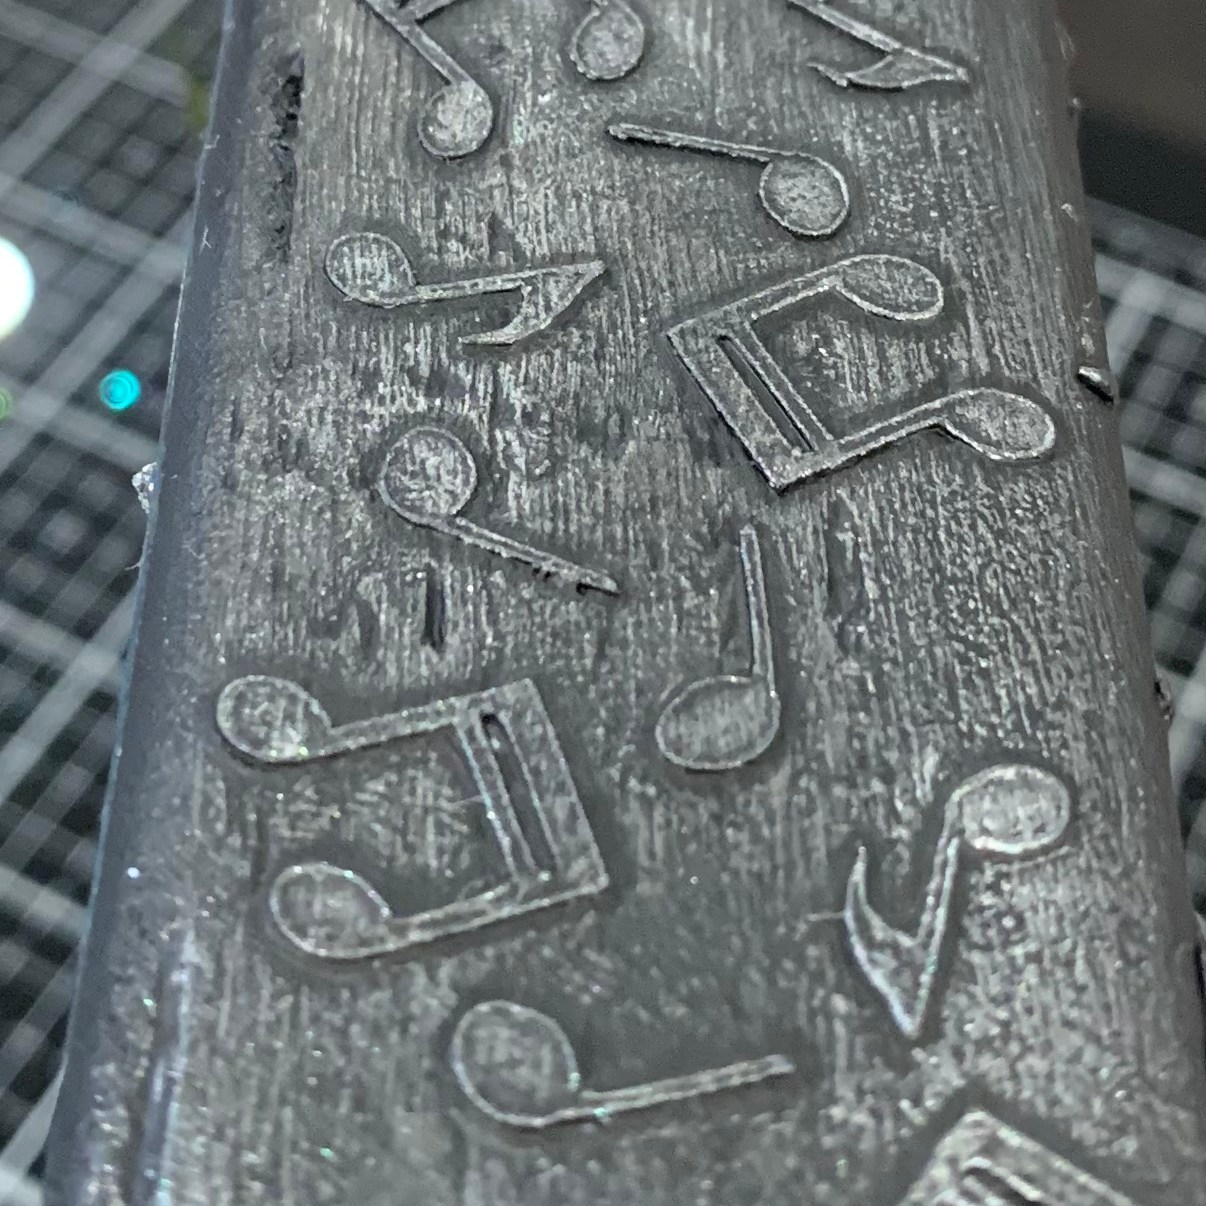
After painting the remaining of the block in black, I used my Cricut to cut music notes from smooth black 80lb card stock. The music notes added that extra little detail to the three edges that would be showing. To adhere them to the block I used Distress matte collage medium as I didn’t want a shinny finish to this project.
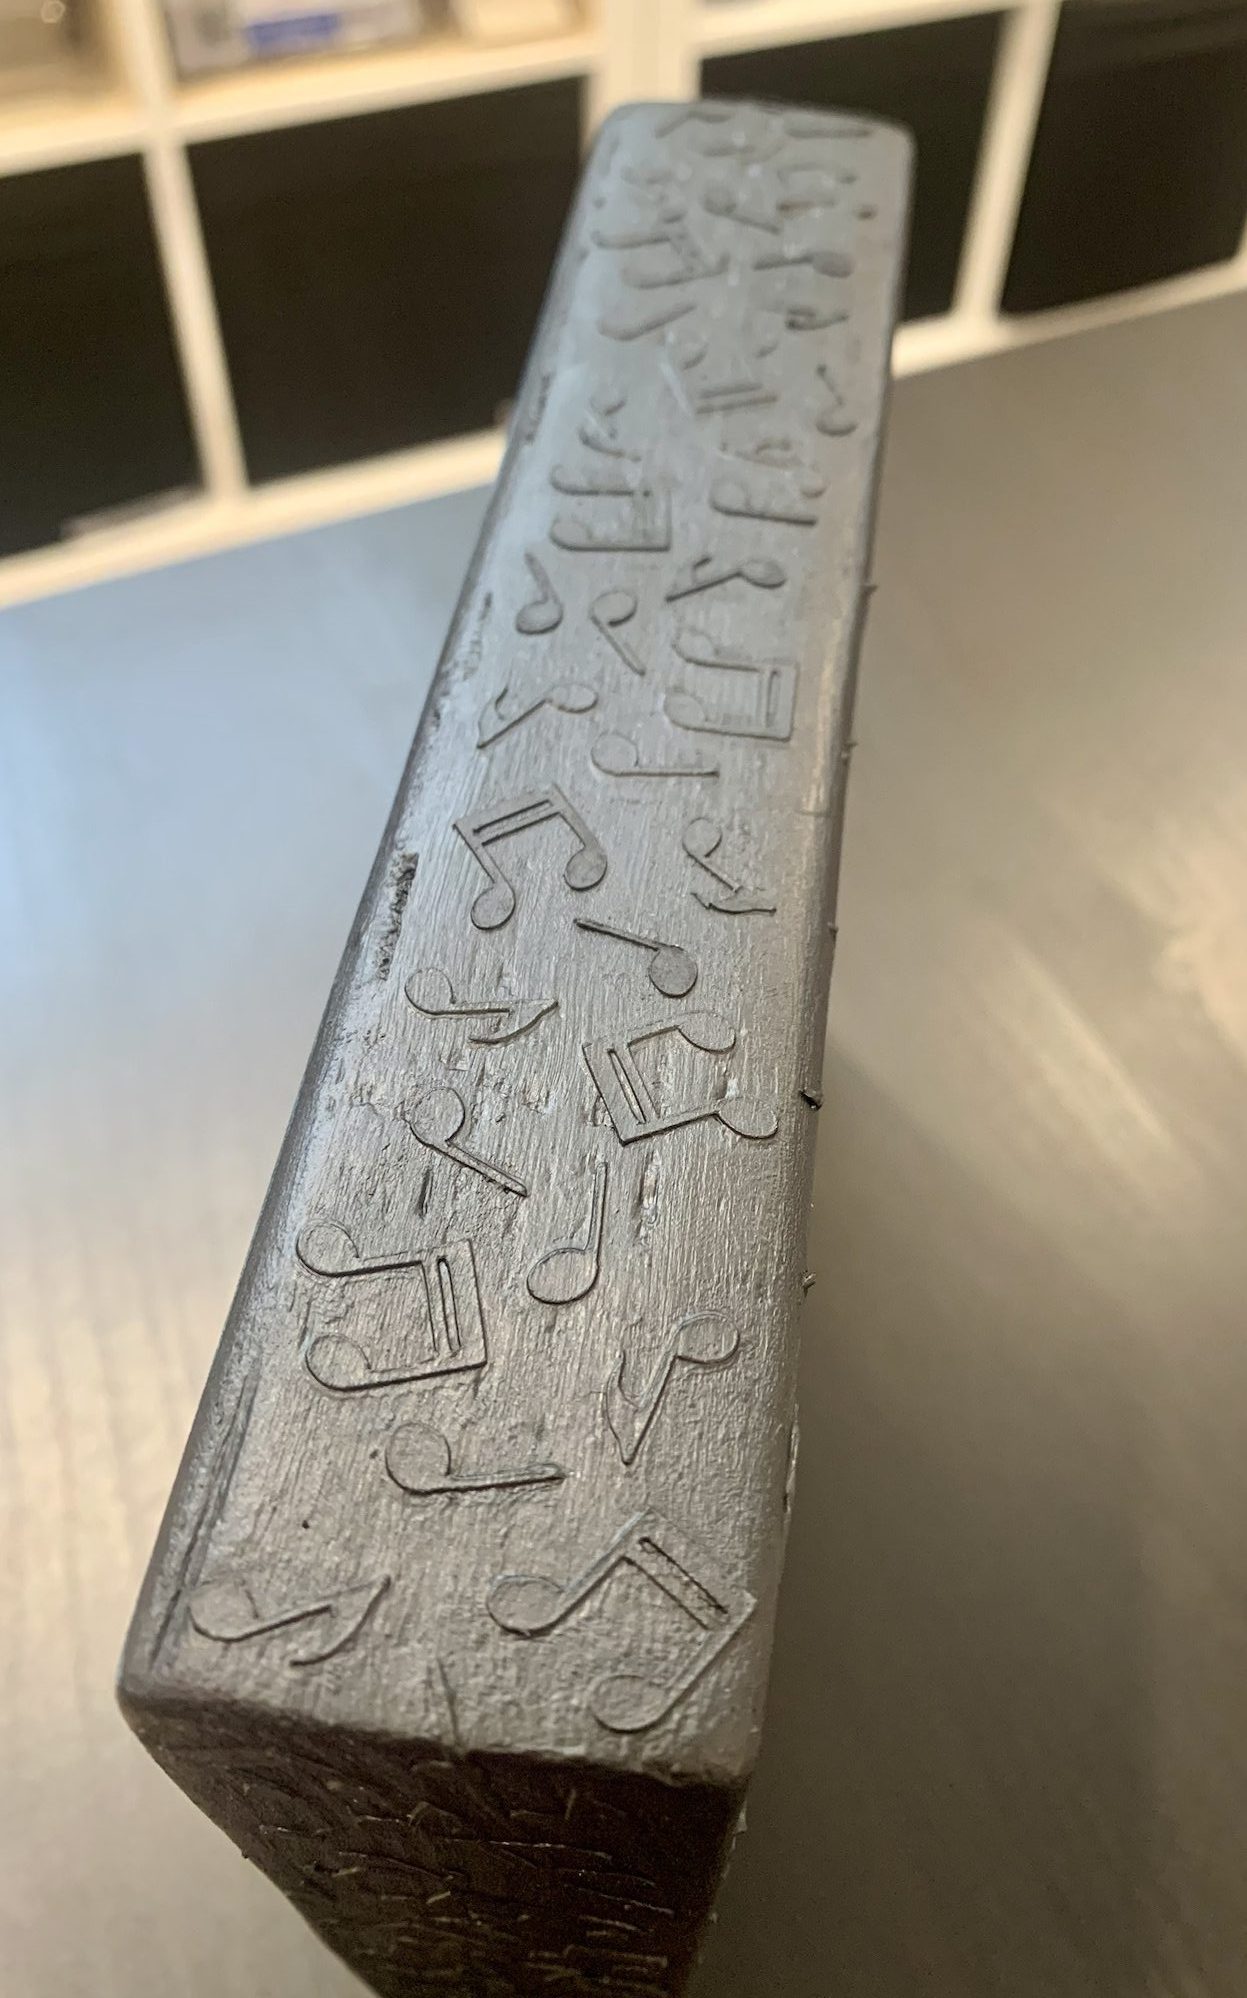
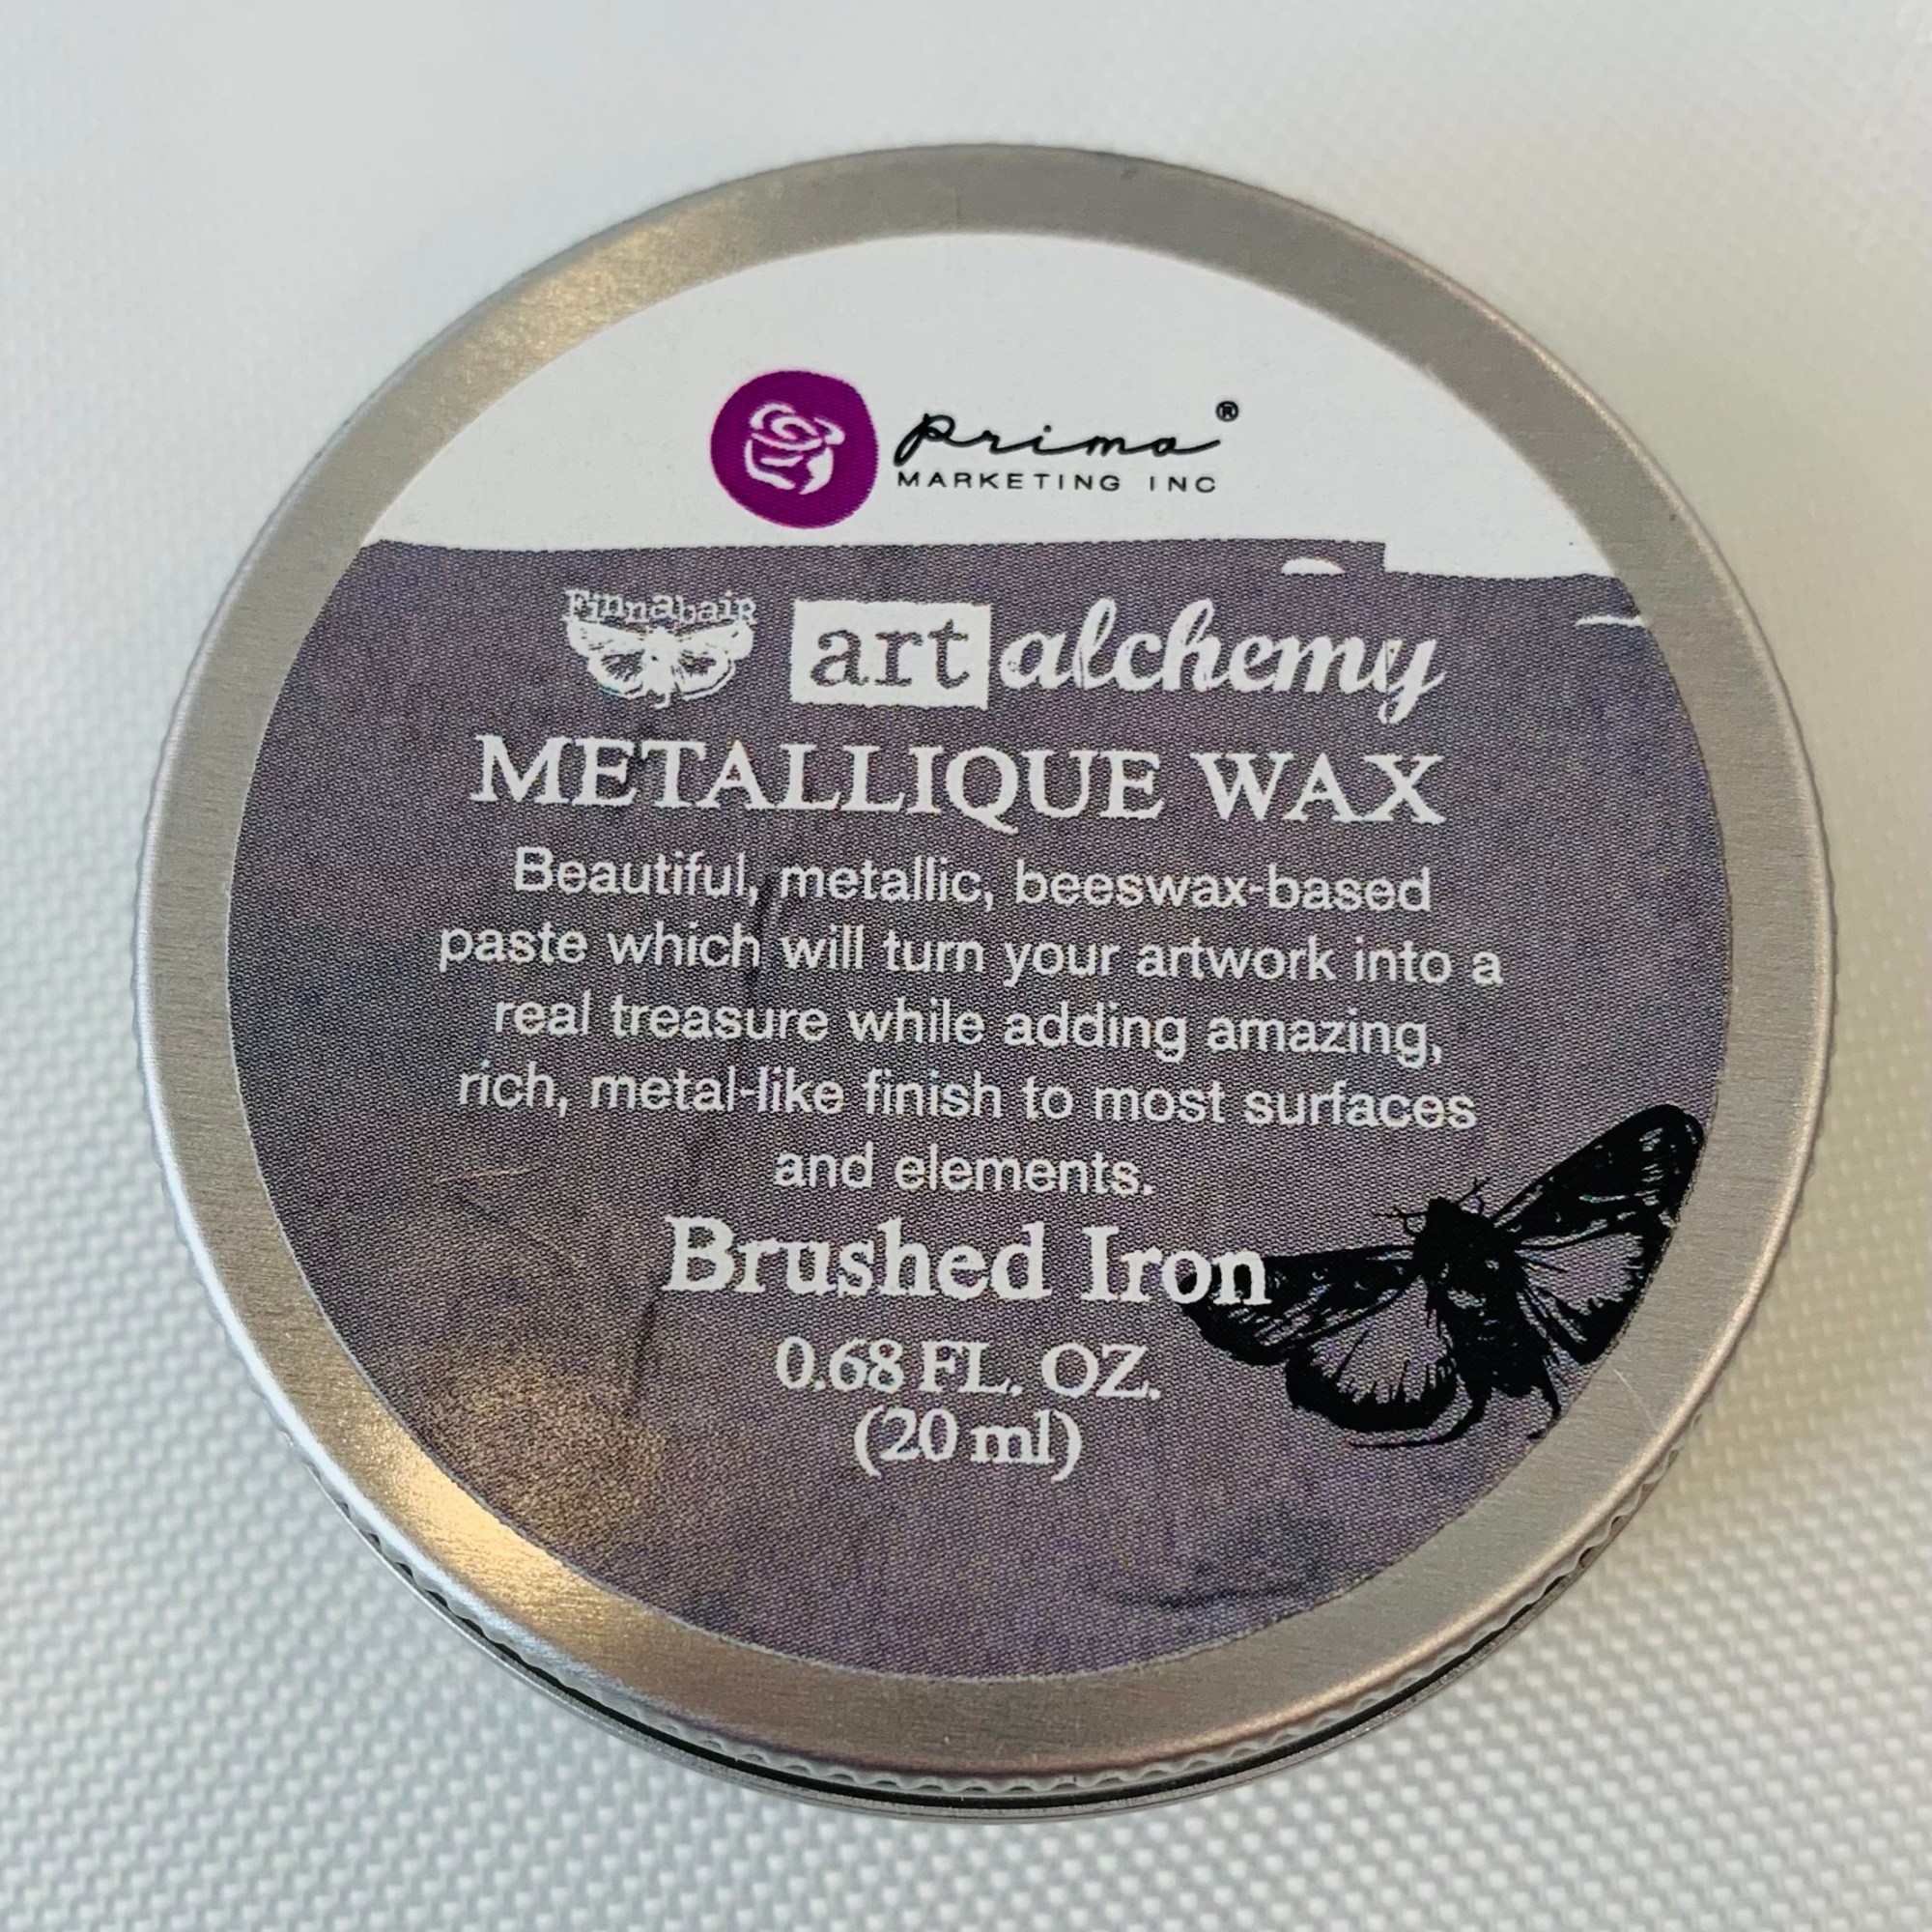
To make the music notes have that little bit of extra dimension and pop, I used the Prima Finnabair Metallique Wax – Brushed Iron. I’ve had this in my crafty stash for a long time as these waxes go a loooooong ways. There is a picture below showing it, but I believe they come in a tube packaging now. When starting to brush over the music notes with the wax on my finger, it seemed to not get into all the crevices and was not liking the look. What I found was using a paint brush you could get a more delicate look and it was easier to spread due to the shape of the notes. Using my finger however still happened lol!
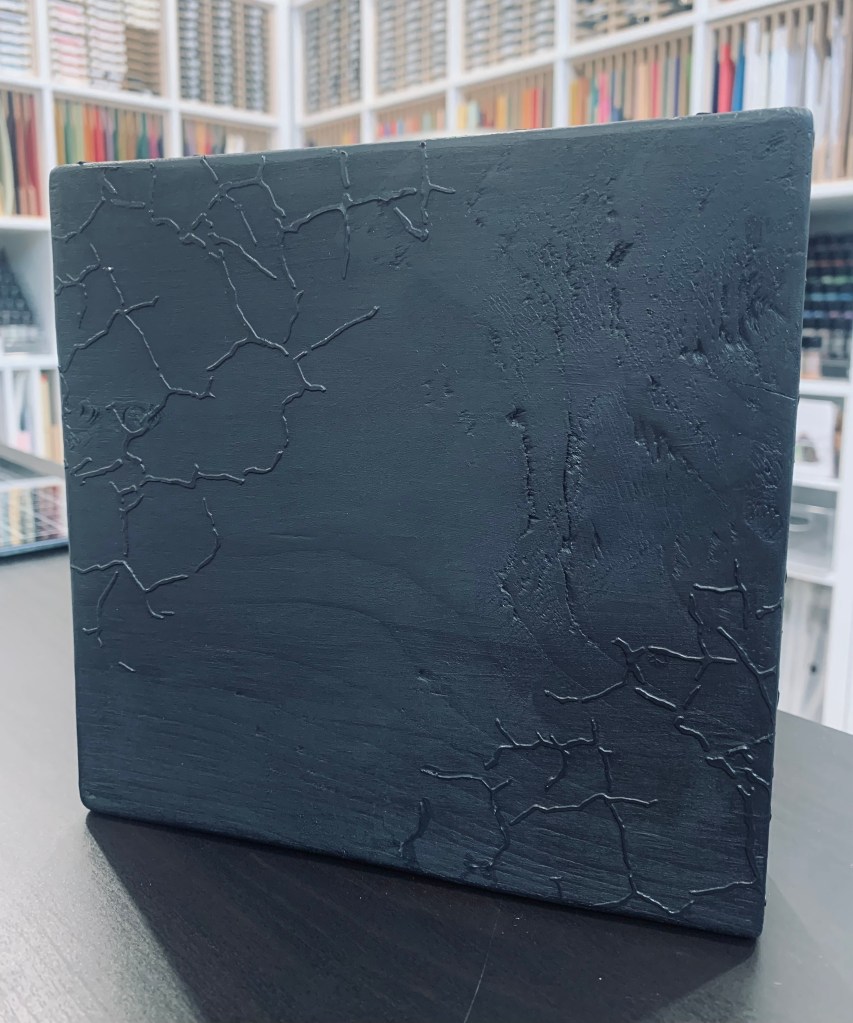
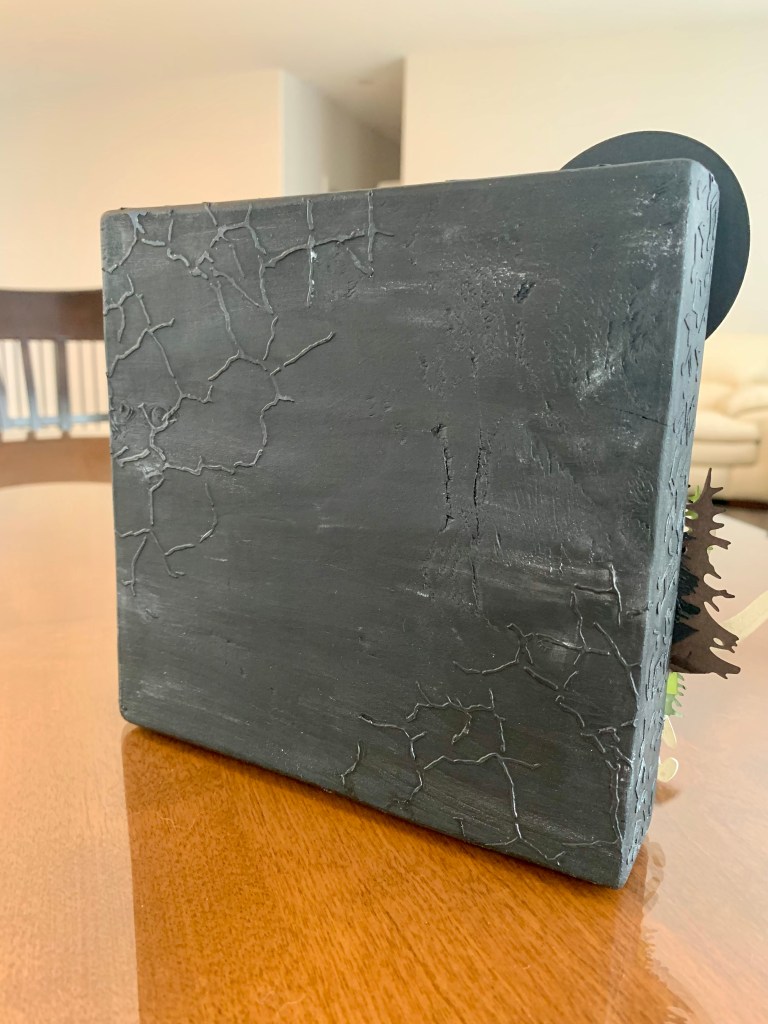
Of course you can’t forget about the back, it is nice on its own but I felt it also needed something. The perfect addition that turned out just as I wanted was Distress translucent paste on the corners using the Tim Holtz layered stencil Fractured seen above. I did paint over it again in the end with the black just to blend it in a bit more. You could leave it either way though in my mind. The metallic wax used over the music notes also was added to the back to give it that extra pop as well!
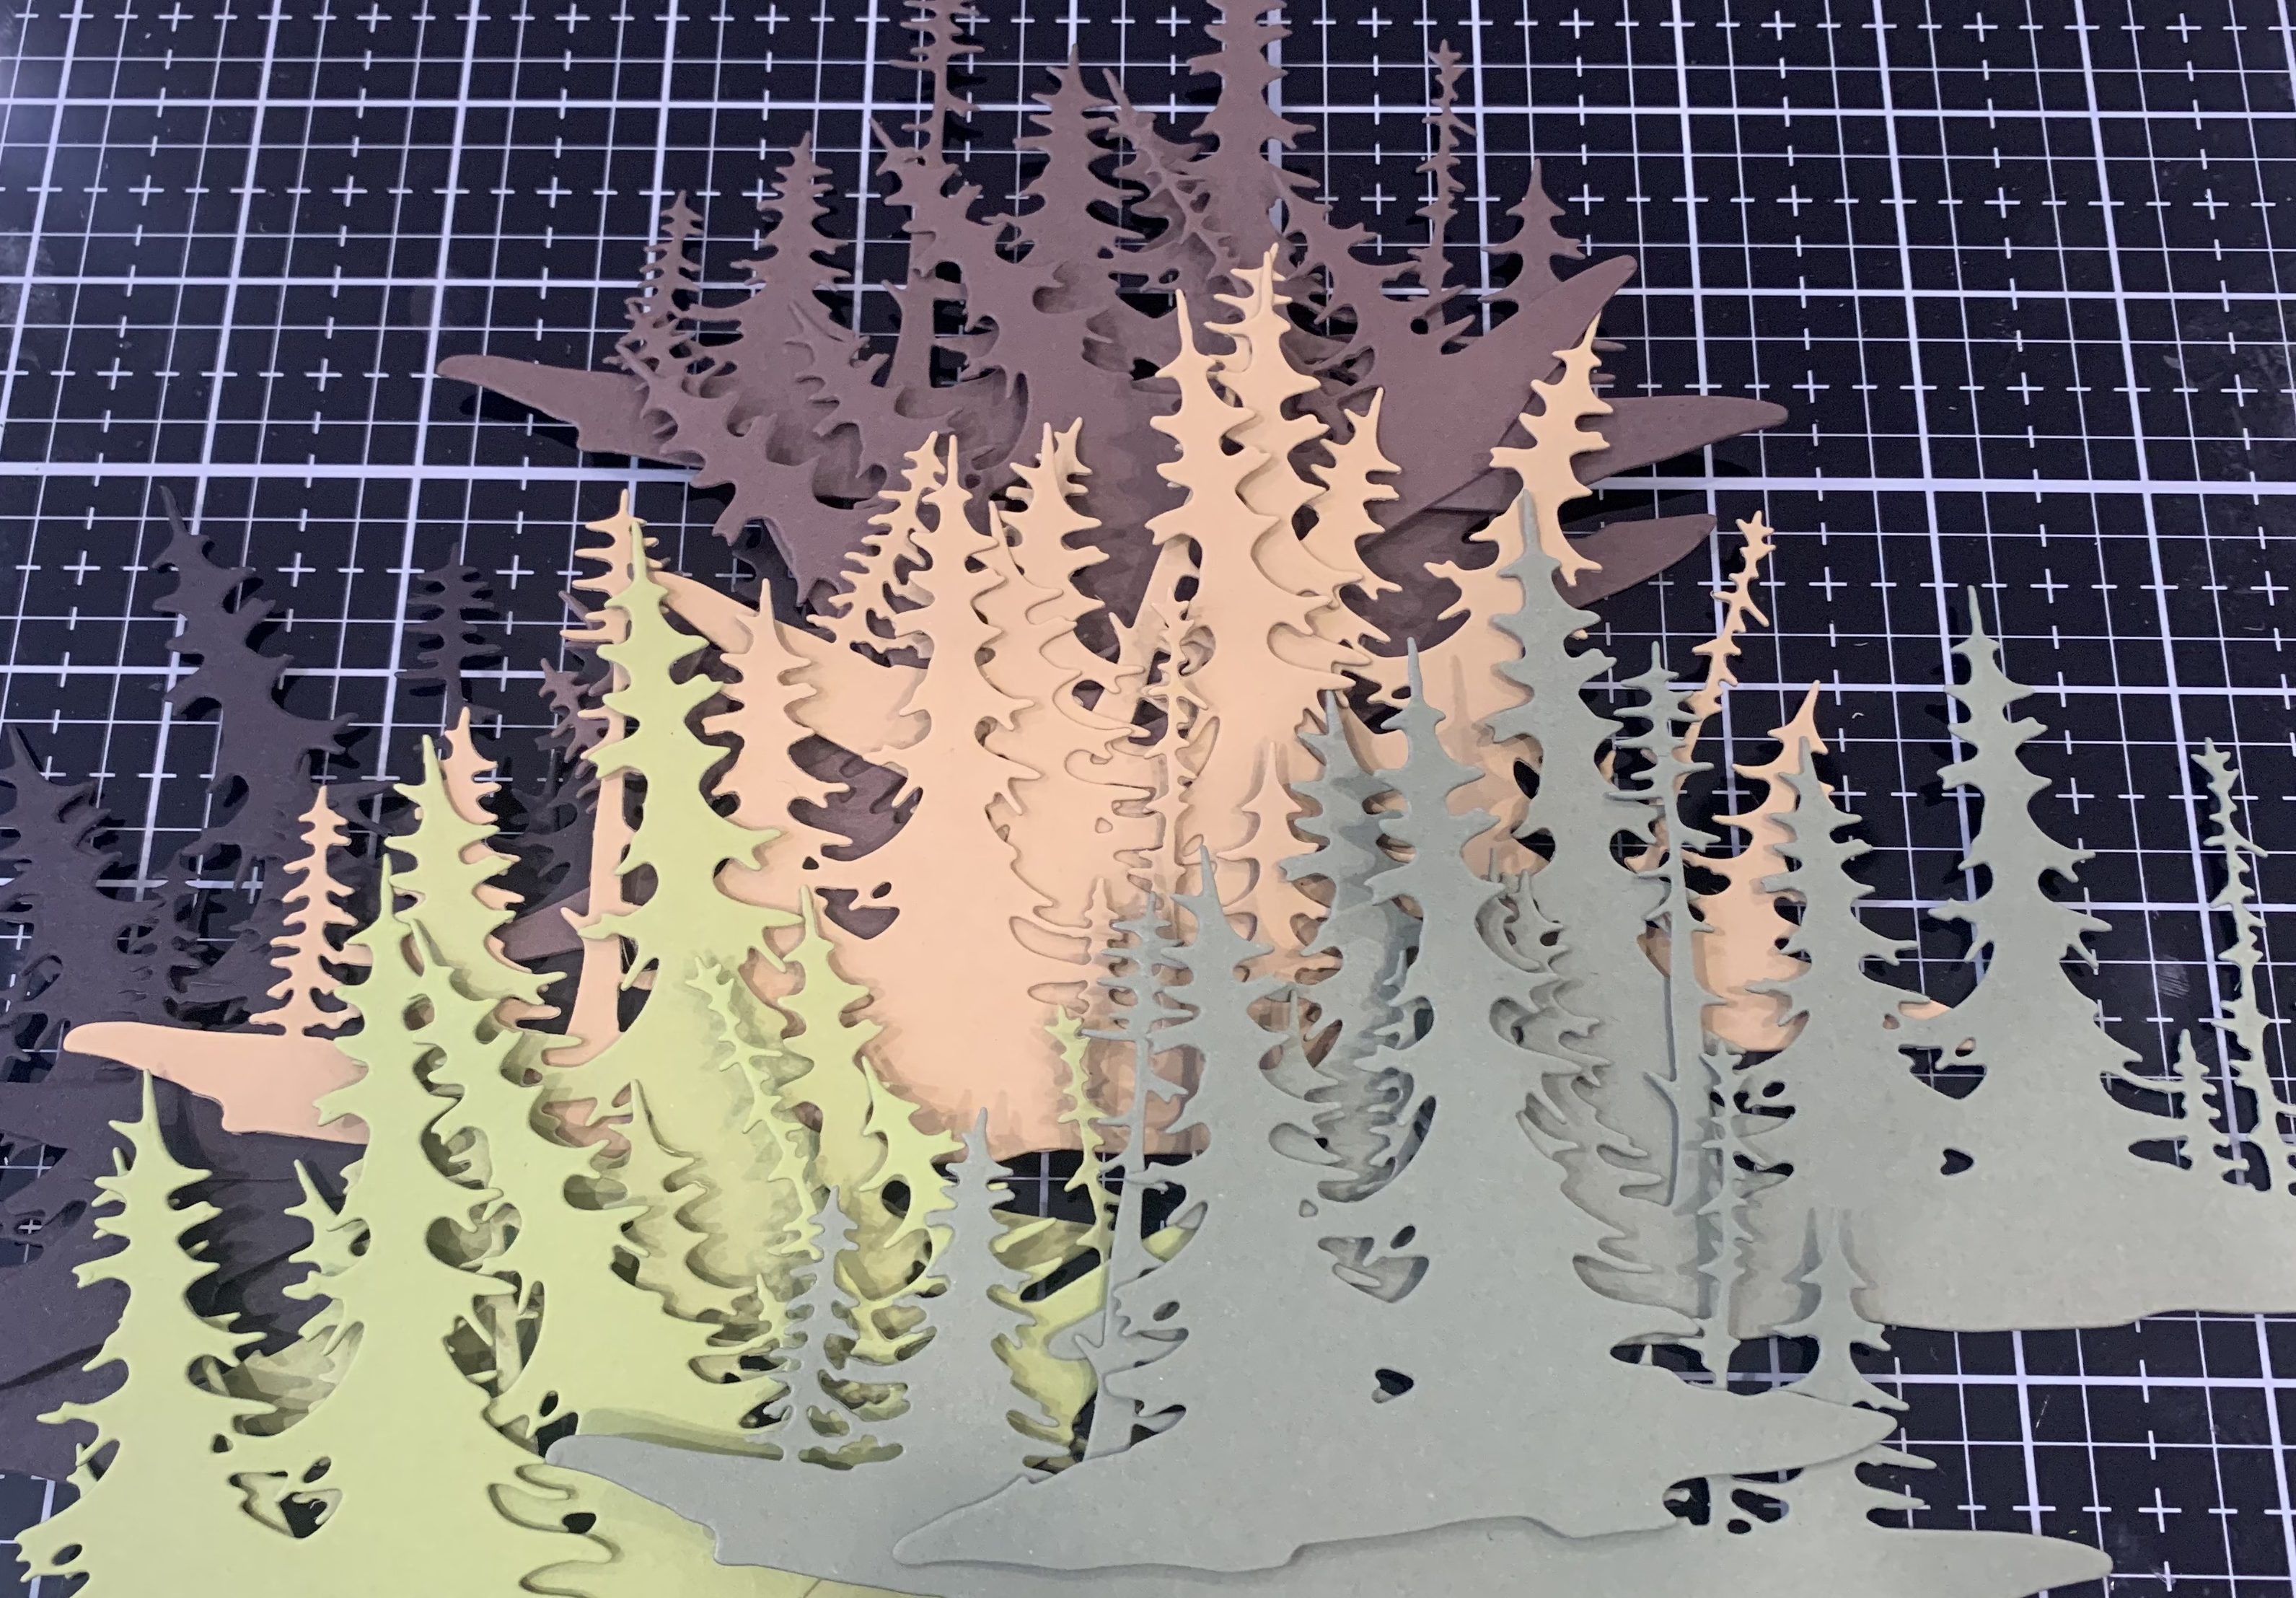
Well now all the paper creations start to come to play. The trees were a big one as I really wanted to create a forest look behind all the animals so I would need quite a few trees. I have used this technique in a previous make that I did. The inspiration for the forest look for both makes came from @craftyrph using Tim Holtz Sizzix die set “Forest Shadow!” For the trees, Stampin Up Black, Early Espresso and Old Olive card stock was used. The other two colours are also Stampin Up but are retired, they are Baked Brown Sugar and Always Artichoke. Always try to use what is in your stash, and remember, you can always create your own with the sprays or inks you have!
The one thing that blew me away once all the trees were cut and I laid them onto the bock to take a look, was how different the sky looked with the trees. Somehow the trees just made that sky come to life and it was a happy accident! Once I was happy with the layout of the trees and glued them all together and onto the block.
Distress grit paste was used to create the look of the ground. When you use a spatula, you just roughly place the Distress grit paste onto whatever surface you are using. I prefer for it to remain rough instead of smooth as it looks more natural to me but you do what ever suits your fancy!
The Tim Holtz Sizzix die “Moonlight” was the perfect size and look so I cut that out of Stampin up card stock and adhered it with some black foam pop up dots. Looking at the project it was still missing one thing to me, stars! I tried a few ideas but the one that looked best was Star Dust stickles from Ranger!
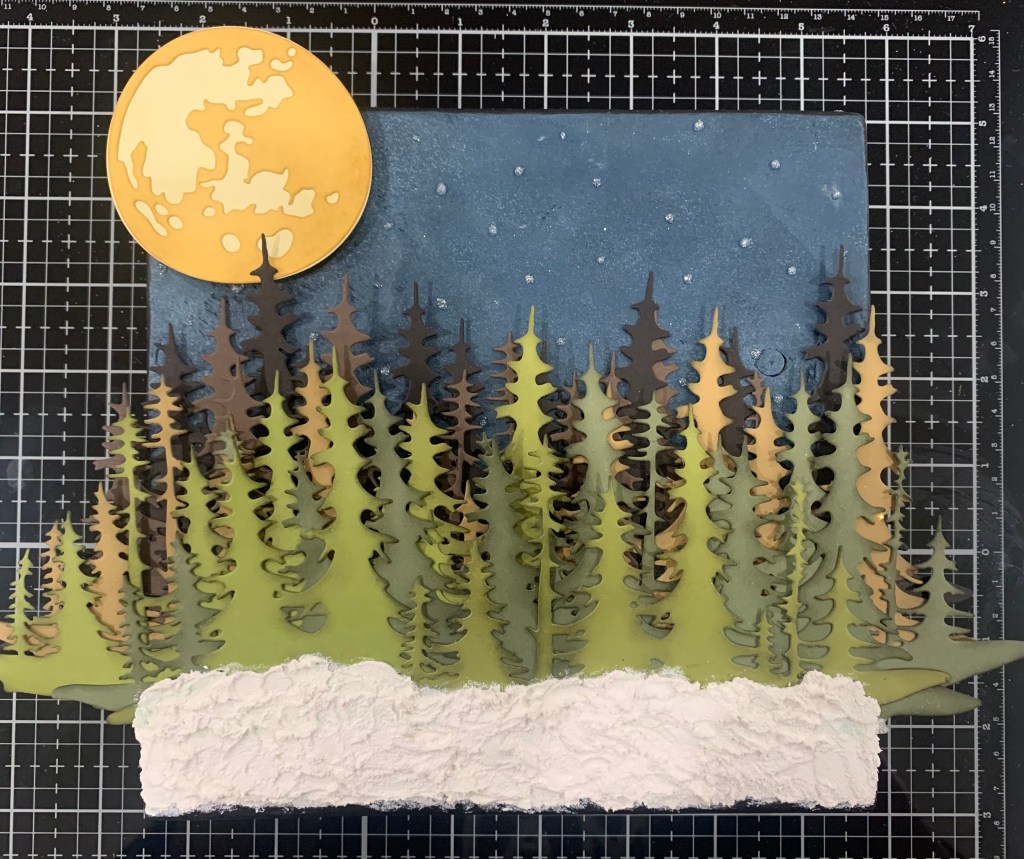
I then sponge on Distress inks to add the colour to the grit paste so it looked like grass and dirt. Now to be completely honest, I forgot which ink colours I used and didn’t take a picture but I will guess which ones I used best I can. Anyone else for a memory lapse in what they did to create a certain look?! I know they were all Distress Oxide and am pretty sure the colours sponged on were Gathered Twigs, Walnut Stain, Bundled Sage and Peeled Paint. Really when doing this, it’s a play until you are happy kind of situation, it’s very forgiving technique again so don’t be afraid to just play!
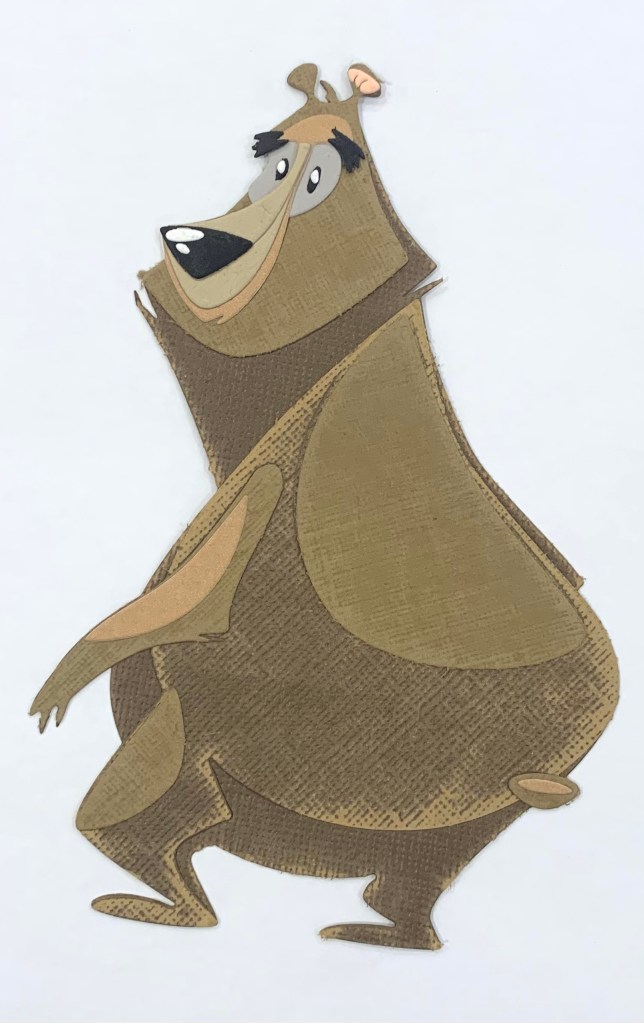
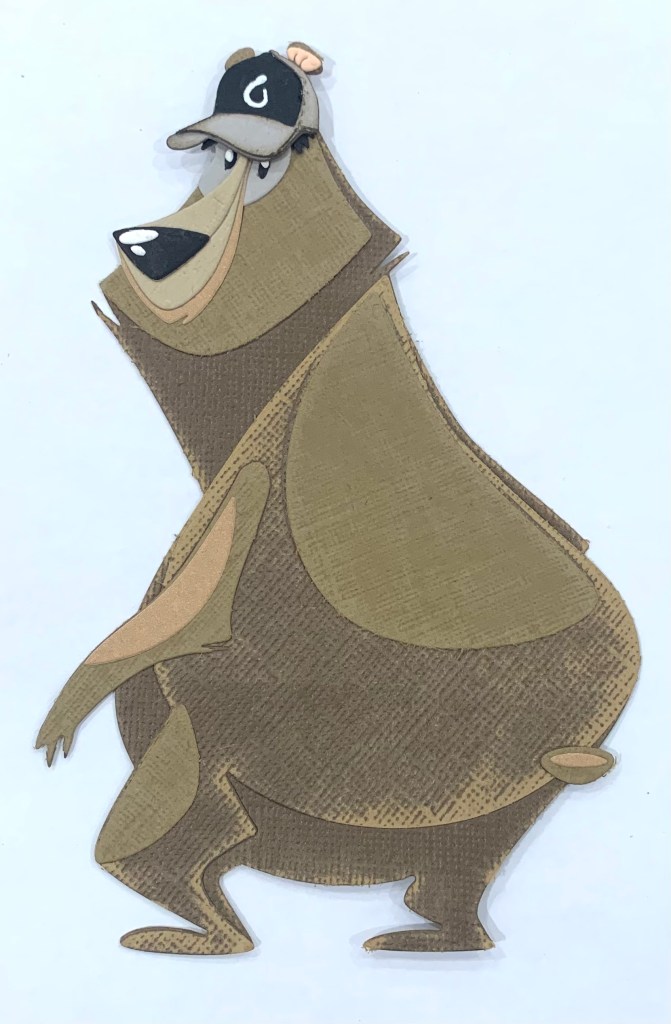
Now comes a part that to me is so fun, cutting out and putting together the animals! I’m not going to list all the paper colours for them but I did use some texture and smooth card stock and it was all Stampin Up colours used. Theadore the bear from Tim Holtz Dies is a fav for sure! Sanding down the textured card stock gave him that worn furry kind of look. Many people use all smooth card stock or even ink paper to create their own to die cut. The options are endless, so make sure you experiment to see what you like!
The hat on Theadore I cut out from the Cricut and used my white uni-ball pen to detail in the logo so it was personalized to my brother’s label. This was a bit of a process to get the right size that I wanted for Theadore’s head!
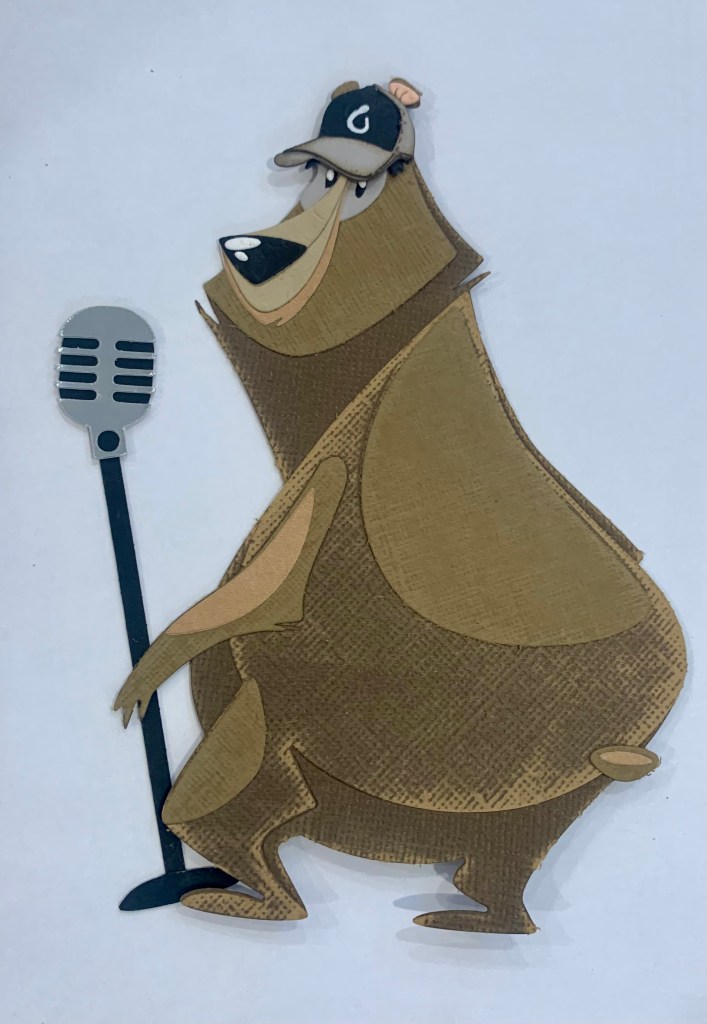
Now for the microphone! I used my Circuit images to get the microphone and stand, just did a bit of altering to make it work for what I needed. Using metallic paper for the mic part helped give it that authentic look. Now he is almost ready for his concert!
One note to make that I have found very helpful, use adhesive sheets to back your paper prior to die cutting when doing colourize dies especially. Trust me, it will make your life easier for all the tiny pieces that can come in these sets!
Next came the audience, who better than the bunnies from the Tim Holtz “Vault Bunny and Chick” die set. They were the perfect pair to come to the concert! These guys to give them a bit more detail, I did ink the edges prior to building them, just love that look. The bow tie there is two of them cut and I layered them to give them that extra pop and the flower is from another Tim die set but I can’t remember which one. Now to put them all onto the block. To adhere them to the block I used black foam pop dots and for one of the bunny’s I doubled them up to have it out further than the one in front of her. I did use a little bit of wet glue on them as well to just give it that extra stick factor.
We are almost there, are you still with me lol, we just have the Onus banner left! The banner came from the Tim Holtz “Bunny Games” die set. I just used a but of wet glue to hang it from the trees strategically between Mr. Hop’s ears so it also helped give it that extra dimension feel. The letters stamped on the banner were stamped in Black Soot Distress ink and the stamp set used was the Heidi Swapp “Storytellers Grid.”
Well that wraps up the making of “The Onus.” I hope you found some inspiration in the behind the scenes making of this project, it was a lot of fun and put a smile on my brother’s face, that’s what I create for!


Wow. The process is incredible. You have learned so much over the year of crafting. You are so incredibly talented… and patient.
Good work my girl.
LikeLiked by 2 people
Thank you!
LikeLike